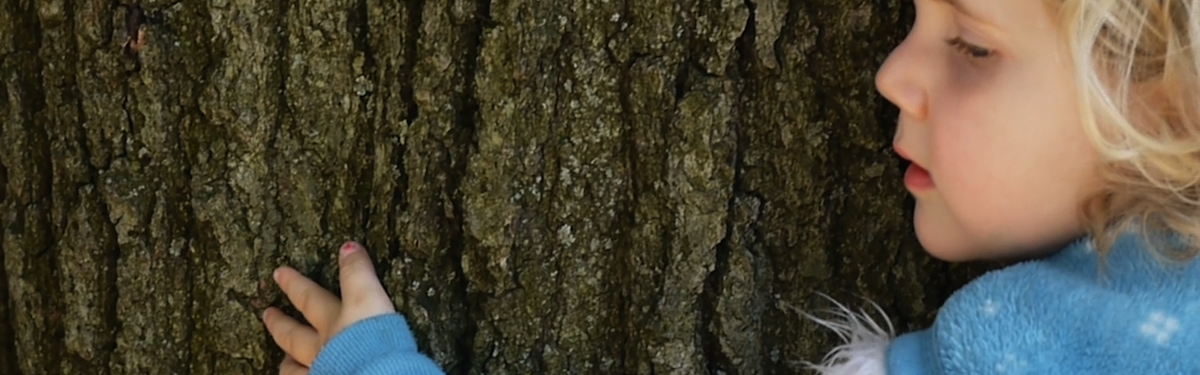
Invite kids to make a winter wreath using the treasures that nature provides in your area this time of year. Wreaths can be a festive addition to your holiday decor or make a wonderful gift for loved ones. Here we share three ways to make a homemade wreath to spread winter joy to family and friends and help kids connect with the natural world.
This activity is featured in our December calendar. If you do not yet have your free copy, get it here.
The Guide
Collect winter treasures
Grab a container and head outside on a walk in your yard, neighborhood or a local park. Notice what is growing in your area this time of year. Collect fallen leaves, pine cones, tree fruits and seeds and anything else you can find in your winter outdoor spaces. If you have evergreens or other plants growing in your yard, cut a few sprigs, too.
Then, help kids use their found winter treasures to create one or more of these wreaths:
Cardboard wreath
Step 1: Make a cardboard frame
Cut a circle out of a piece of cardboard and then cut a smaller circle inside. Tip: Use two bowls of different sizes to trace your inner and outer circle.
Step 2: Attach twine
Tie one end of a piece of twine or string around the cardboard ring. Then, wrap it around the ring and secure the end to make a loom for kids to weave treasures in and out of. (You can also skip this step and offer glue for kids to attach their treasures to the cardboard.)
Step 3: Decorate!
Invite kids to weave their nature objects through the twine. Or, offer school glue and a paintbrush for kids to stick their treasures. Let kids work at their own pace and weave to their heart’s content, if you have time. Try to remember that it’s the process of gathering and adding things that matters, not how marvelous the final product is.
Step 4: Display and enjoy!
Tie a piece of twine around one side of the cardboard ring and make a loop for hanging. Then, find a special spot in your home to hang your winter wreath for family and friends to enjoy!
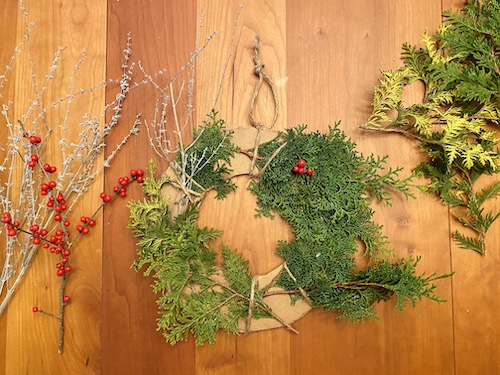
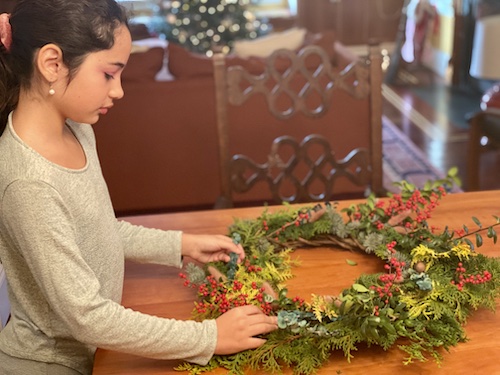
Grapevine or Wire Wreath
Step 1: Purchase a wreath frame
Most craft stores carry wire or grapevine wreath frames in a variety of sizes. These frames provide a sturdy and weather-friendly foundation for a homemade wreath.
Step 2: Decorate!
Invite kids to weave their nature objects through the spaces between the wires or vines. You can also use twine or wire to secure treasures that don't fit well through the spaces (e.g. pine cones). To add fragrance, offer cinnamon sticks, rosemary springs or other herbs!
Step 3: Display and enjoy!
Tie a piece of twine around one end of the frame and work together to find the perfect spot to display your wreath (e.g. a special spot in your home, on the door, on a tree).
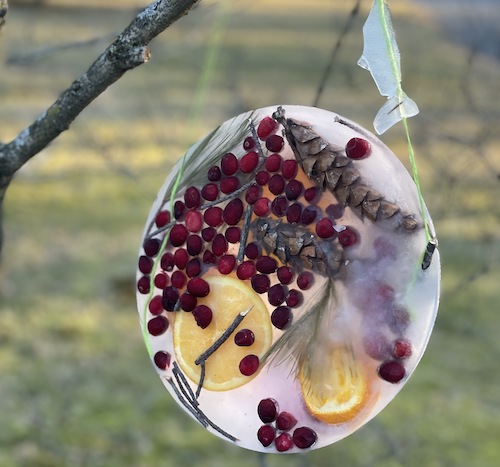
Ice Wreath
Step 1: Gather a freezer-safe container
Grab a container that can be placed in the freezer. A bundt cake pan will create the perfect wreath shape, but you can also use a pie or cake pan or any circular container.
Step 2: Make your ice wreath
Follow these steps to make a wreath of frozen treasures:
Fill your cake or pie pan with water and layer in your winter treasures. You can also add orange slices, cranberries or cinnamon sticks for fragrance and a pop of color!
Put both ends of a 10-12 inch piece of twine into the water so that they will freeze in the ice, forming a handle.
Keep your pan outside until it freezes (if temperatures are below freezing). Or, freeze in the freezer (at least 24 hours).
Keep checking back to observe how the water and contents are changing as they freeze. Take pictures!
Step 3: Display, observe and enjoy!
When it is fully frozen, remove from the freezer and put the pan in a sink full of warm water to loosen the ice. Then tip the wreath out.
Take it outdoors and observe, marveling as the sun streams through it. Hang it from a tree limb and observe. Watch as kids interact with it, using various senses.
Why is this activity great for kids?
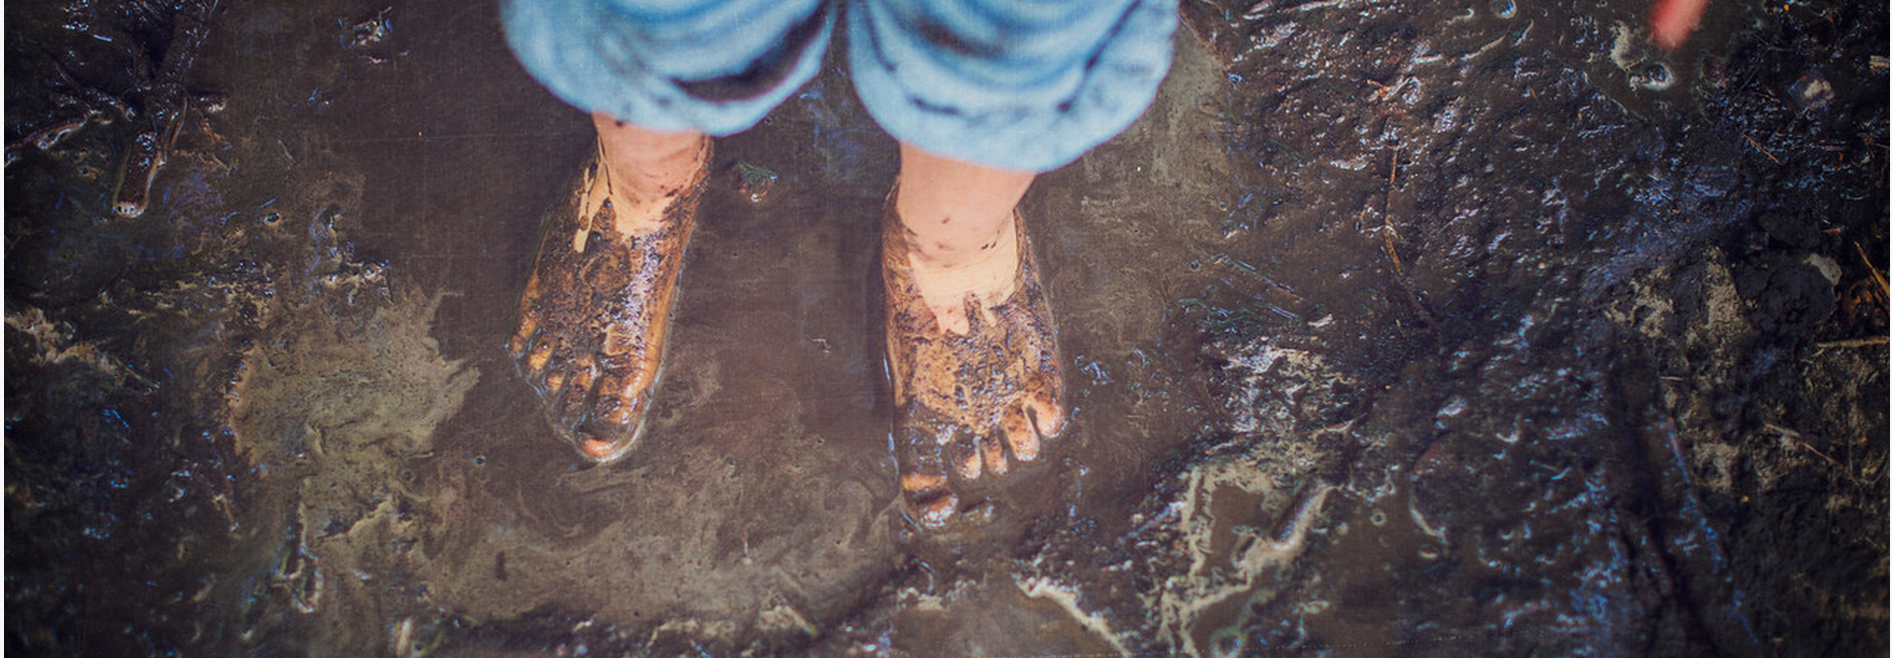
Designing a winter wreath using found objects supports kids’ creativity, problem solving and fine motor skills. Working with natural objects is also a workout for kids' sensory systems. This activity also invites kids to notice the gifts that nature provides in your area this time of year, helping them connect with the cycles and rhythms of the natural world.
By creativity, we mean the ability to both imagine original ideas or solutions to problems and actually do what needs to be done to make them happen. So, to help kids develop creativity, we parents need to nurture kids' imaginations and give them lots of chances to design, test, redesign and implement their ideas.
"Creativity is as important now in education as literacy, and we should treat it with the same status.”
Why, you ask? For one, it is through being creative that a person is able to get senses, sensibility and spirit working together. Simply put, without creativity, we don't think our kids will live a full life.
On a more practical level, it's also the means by which humans of all ages make an impact on the world and other people around them. A lot of heavy stuff is going to go down in our kids' lifetime, and their generation will need to imagine and implement solutions to big and very complicated problems. Although our kids are still far from public office or the boardroom, today's political and business leaders worldwide are already pointing to creativity as the most important leadership quality for the future.
Although years from the art studio or design lab, little kids can learn to think and act creatively if you give them time and the right practice.
Naturalist
Category:
Thinking Skills
What is a Naturalist?
The oldest and simplest definition, “student of plants and animals,” dates back to 1600. The term has evolved over time, it's importance changing as the values of dominant culture have changed. 400 years after that old definition, Howard Gardner, the paradigm-shifting education theorist, added “naturalist” to his list of “multiple intelligences.” Gardner challenged the notion that intelligence is a single entity that results from a single capability. Instead, he recognizes eight types of intelligence, all of which enable individuals to think, solve problems or to create things of value. To Gardner, the Naturalist intelligence enables human beings to recognize, categorize and draw upon certain features of the environment.
A true naturalist has not simply Googled and learned the names of plants, animals, rocks, etc. Rather, he or she has had direct experience with them, coming to know about them and using all senses to develop this intelligence. A naturalist also has a reverence for nature, valuing and caring for living things from the smallest mite to the tallest tree. A naturalist comes to not only knowing the creatures and features of his or her environment, but treasuring them in thought and action.
Why does it matter?
In the process of becoming a naturalist, children become stewards of nature, a connection that is associated with a range of benefits, including greater emotional well-being, physical health and sensory development (not to mention the benefits to nature itself!). In a world in which primary experience of nature is being replaced by the limited, directed stimulation of electronic media, kids senses are being dulled and many believe their depth of both their interest in and capacity to understand complicated phenomena are being eroded. To contrast, the naturalist learns about the key features of their natural environment by using all of his senses and be interpreting open-ended and ever-changing stimuli.
Problem Solving
Category:
Thinking Skills
What are Problem Solving Skills?
When we talk about problem solving, we mean the ability to solve a problem in which the solution is not obvious and in which the possible paths to solution are many. To solve such problems, kids will need two things. First, they’ll need the self confidence and comfort to both attempt to find and persist in finding a solution. The only way to develop this is to be given the chance to struggle with ambiguous situations or open-ended problems. We parents are all guilty, from time to time, of helping kids avoid struggle or swooping in to alleviate frustration when our kid encounters challenge. The goal is actually to do the opposite whenever possible. As long as the problem is not too difficult to understand or challenging to solve, even young kids can get comfortable with the feeling of not knowing the solution and fall in love with the joy of finding a solution to a problem.
Kids also need strategies to attack problems with which they are faced. If adults are able to work with kids to solve problems “as a team” but in such a way that the children feel and act “in charge” of the decisions, adults can actually teach foundation problem solving skills and strategies through modeling. For example, when you solve a problem together, kids get practice with key parts of the process like brainstorming, testing ideas, revision and solution. It’s also pretty easy to model how to use simple strategies like trial and error or breaking a problem down into smaller parts. Although children age 1 to 7 should not be expected to name, catalog or identify when to use a particular problem solving strategy, they are able to form habits and repeat approaches once those habits or approaches have become familiar. The more problems they solve, the better they know and can use these methods.
Why does it matter?
“The highest ranked skills for students entering the workforce were not facts and basic skills; they were applied skills that enable workers to use the knowledge and basic skills they have acquired” (Source: Are They Really Ready for Work? Conference Board 2006).
Although it seems a long way to go before our young children are hitting the job market, the ability to solve challenging, ambiguous problems has already been identified as a critical skill for success in the 21st Century. With advances in technology, finding information has never been easier. However, knowing how to interpret a problem and use available information to devise a solution still needs to be learned. And, we fear that the classrooms of today are neither designed nor incentivized to teach these skills effectively. In most schools, so much time is spent learning discrete skills, that applied skills like problem solving are wildly underemphasized. In a world that demands it, it is increasingly necessary that children learn and practice these skills outside of school.
Sensory
Category:
Body Skills
What is Sensory Development?
Although some scientists classify as many as 20 senses, when childhood educators talk about "developing the senses," we typically mean developing the five standard senses: sight, hearing, touch, smell and taste. In addition to honing these senses, educators care about sensory integration, which is the ability to take in, sort out, process and make use of information gathered from the world around us via the senses.
Why does it matter?
The better kids are able to tune and integrate their senses, the more they can learn. First, if their senses are sharper, the information kids can gather should be of greater quantity and quality, making their understanding of the world more sophisticated. Further, until the lower levels of the brain can efficiently and accurately sort out information gathered through the senses, the higher levels cannot begin to develop thinking and organization skills kids need to succeed. Senses also have a powerful connection to memory. Children (and adults) often retain new learning when the senses are an active part of the learning.
So, if kids have more sensory experiences, they will learn more, retain better and be better able to think at a higher level. Makes the days they get all wet and dirty in the sandbox seem better, doesn't it?
 Age: 0 to 8+
 Time: 1 hour+
 Materials: objects from nature; twine or string; one of the following: cake pan, cardboard, grapevine or wire wreath frame